Configuring Modules#
After successfully connecting to your SLM-MX device, the next step is to configure the connected modules.
Warning
The SLM-MX does not support hot-swapping of modules.
You must power down the SLM-MX before a module is removed or replaced, and a new configuration will need to be sent to the module.
Module Detection#
The SLM-MX Configurator automatically detects all modules connected to your SLM-MX. The detected modules will be displayed in the “Modules” section of the configurator.
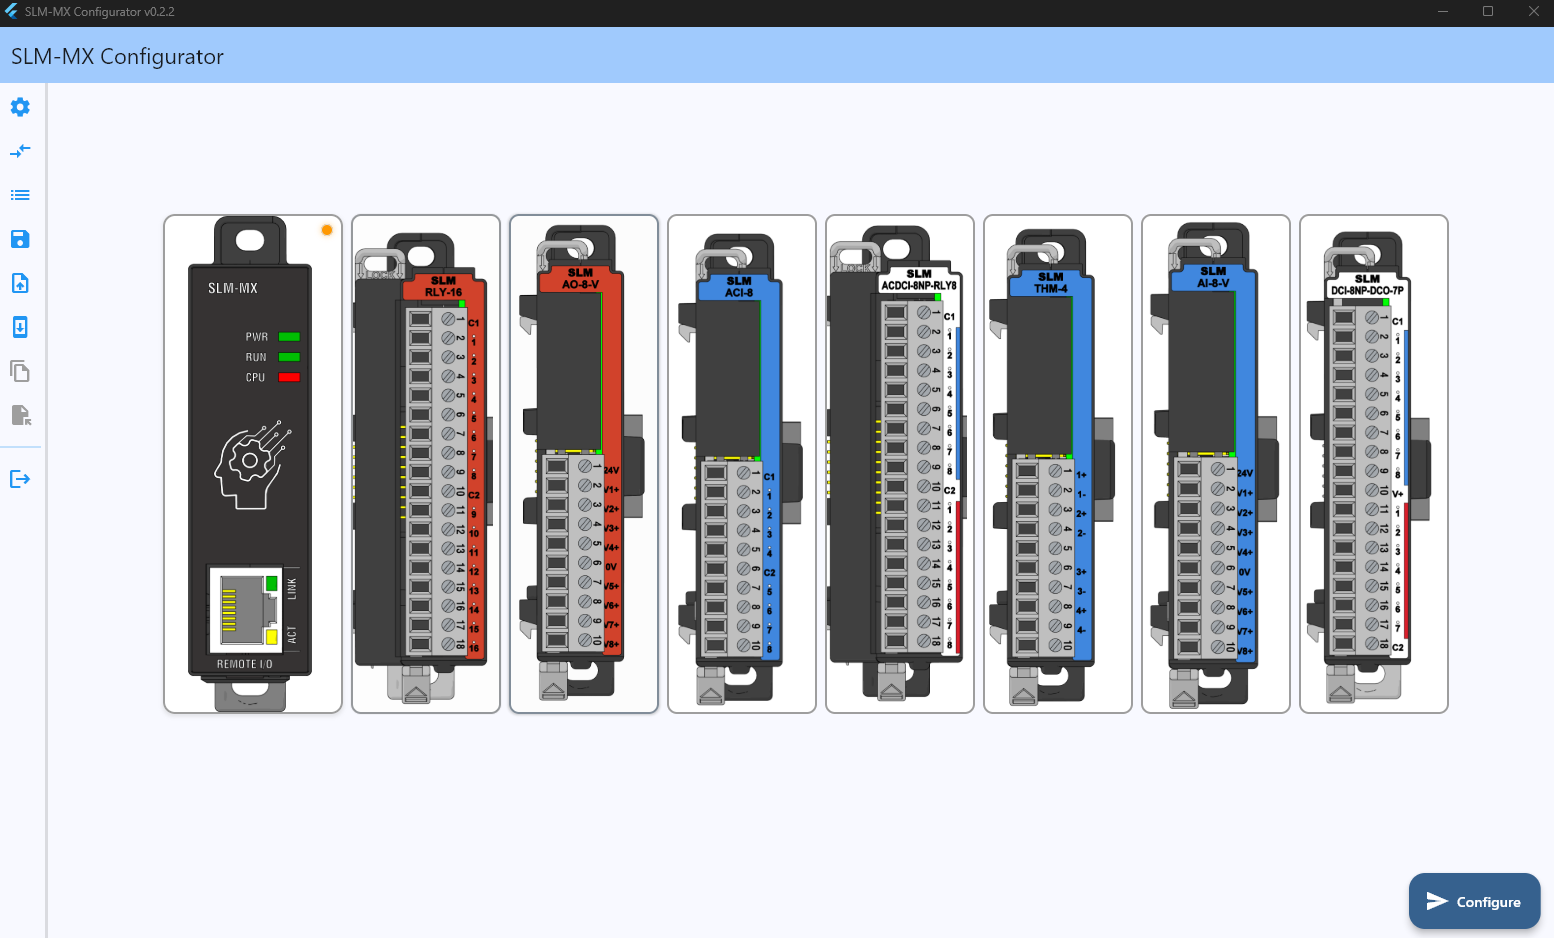
Each module, as well as the SLM-MX device is inside of a collapsible “card”.
Clicking on the card will expand it to show the module/device information. And clicking on the same or another card will collapse it.
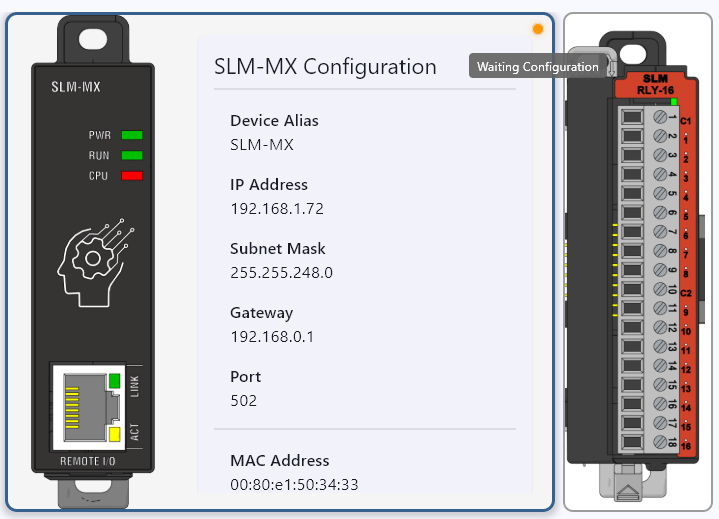
SLM-MX Device Card#
Clicking on the SLM-MX device card on the left will expand and show network information such as the IP address, subnet mask, port, mac address, as well as a button to take you to the system configuration page and a button to factory reset the device.
There is also a colored dot on the top right of the card that will show the status of the device, with a tooltip to provide more information when hovered over.
Module Cards#
For modules that require configuration, which are all analog modules, expanding the card will show the module configuration options.
For detailed information on configuring specific modules, please refer to their respective documentation section at SLM I/O Modules.
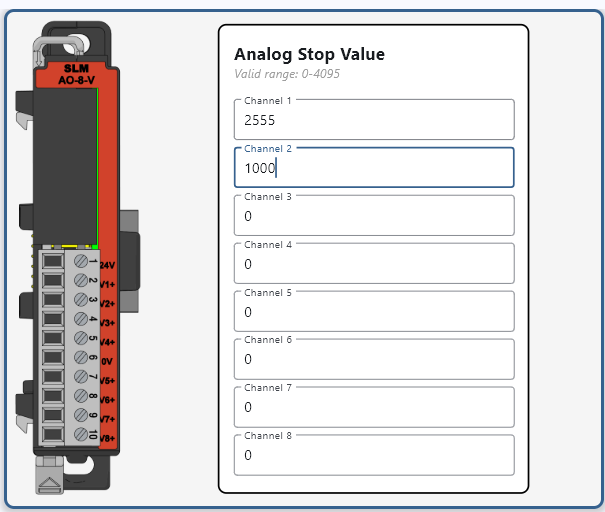
Analog Output Modules#
Here you can configure the Analog Stop Value, which is the value the module will output when the watchdog timer/safe shutdown is triggered.
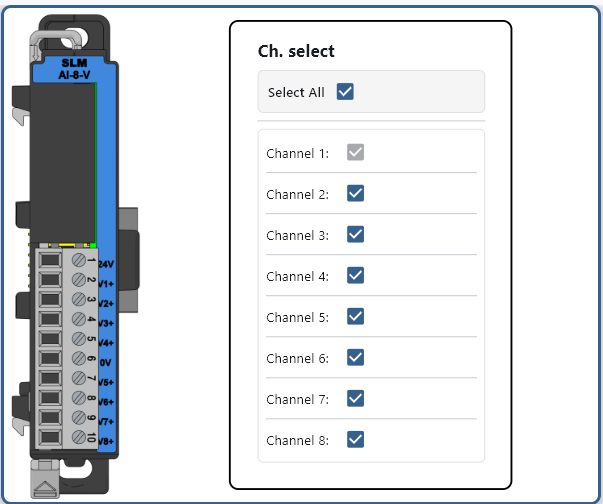
Analog Input Modules#
Most analog input modules will have toggles to enable or disable each channel individually. Channel 1 cannot be disabled.
Specialty Modules#
Specialty modules such as the SLM-THM-4 will have additional configuration options.
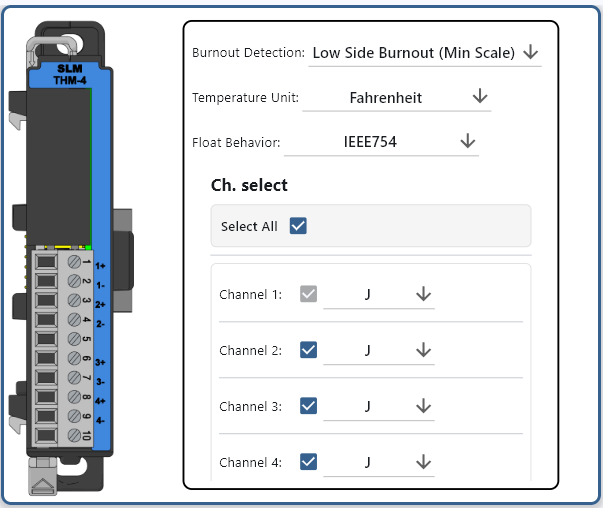
Module Configuration#
All modules will have a default configuration already set that can be changed by the user.
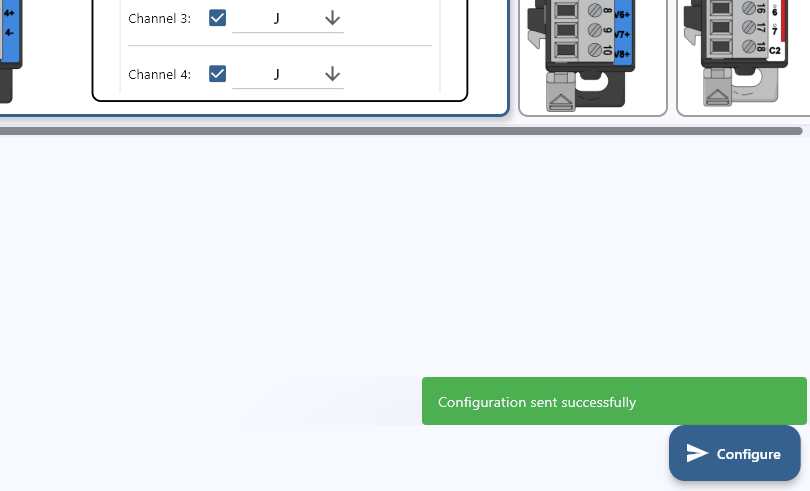
After configuring each module, click the Configure button on the bottom right of the configurator to save the configuration to the modules.
After configuration has been sent, you should see a message on the bottom right of the configurator indicating that the configuration has been sent successfully. And the status dot on the top right of the module card will turn green.
IO Configuration Page#
On the expandable menu bar on the left, click the “IO Configuration” button to go to the IO Configuration page.
This is another way to configure each module with each module having it’s configuration options already expanded.
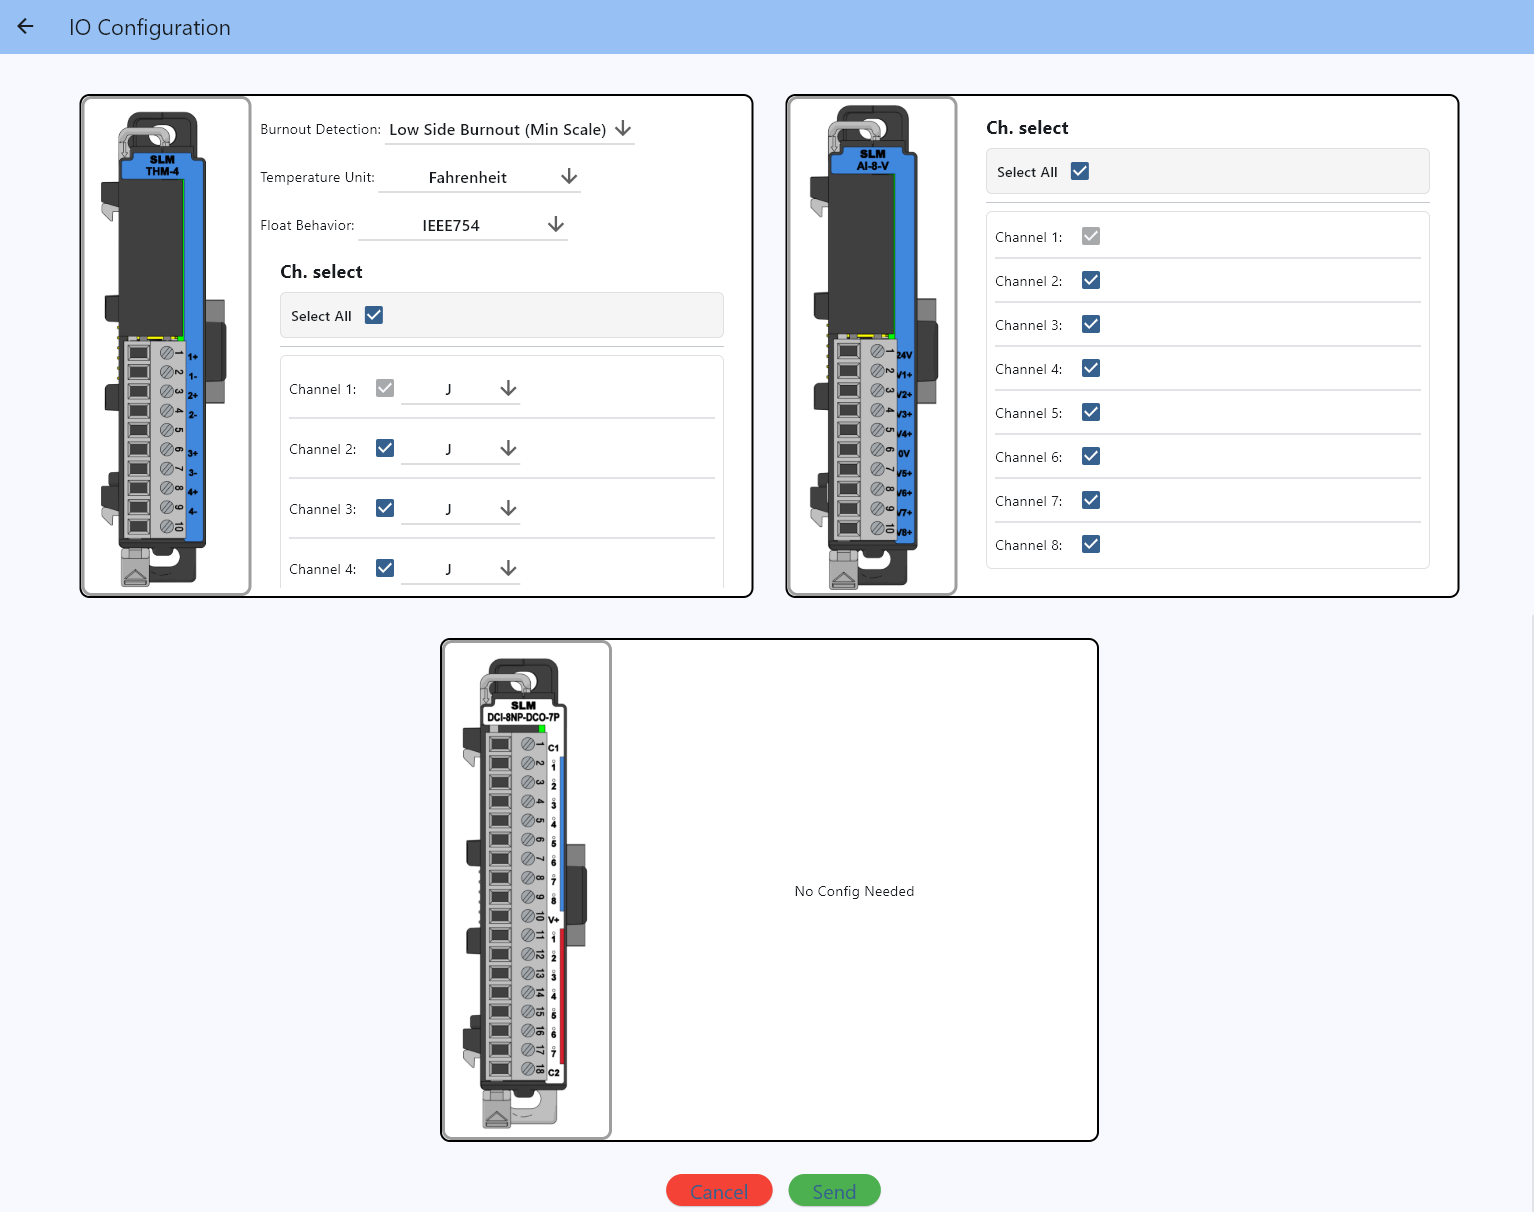
Once each module has been configured, click the Send button on the bottom right of the configurator to save the configuration to the modules.
Previous: Scanning for Device | Next: Configuring System Settings